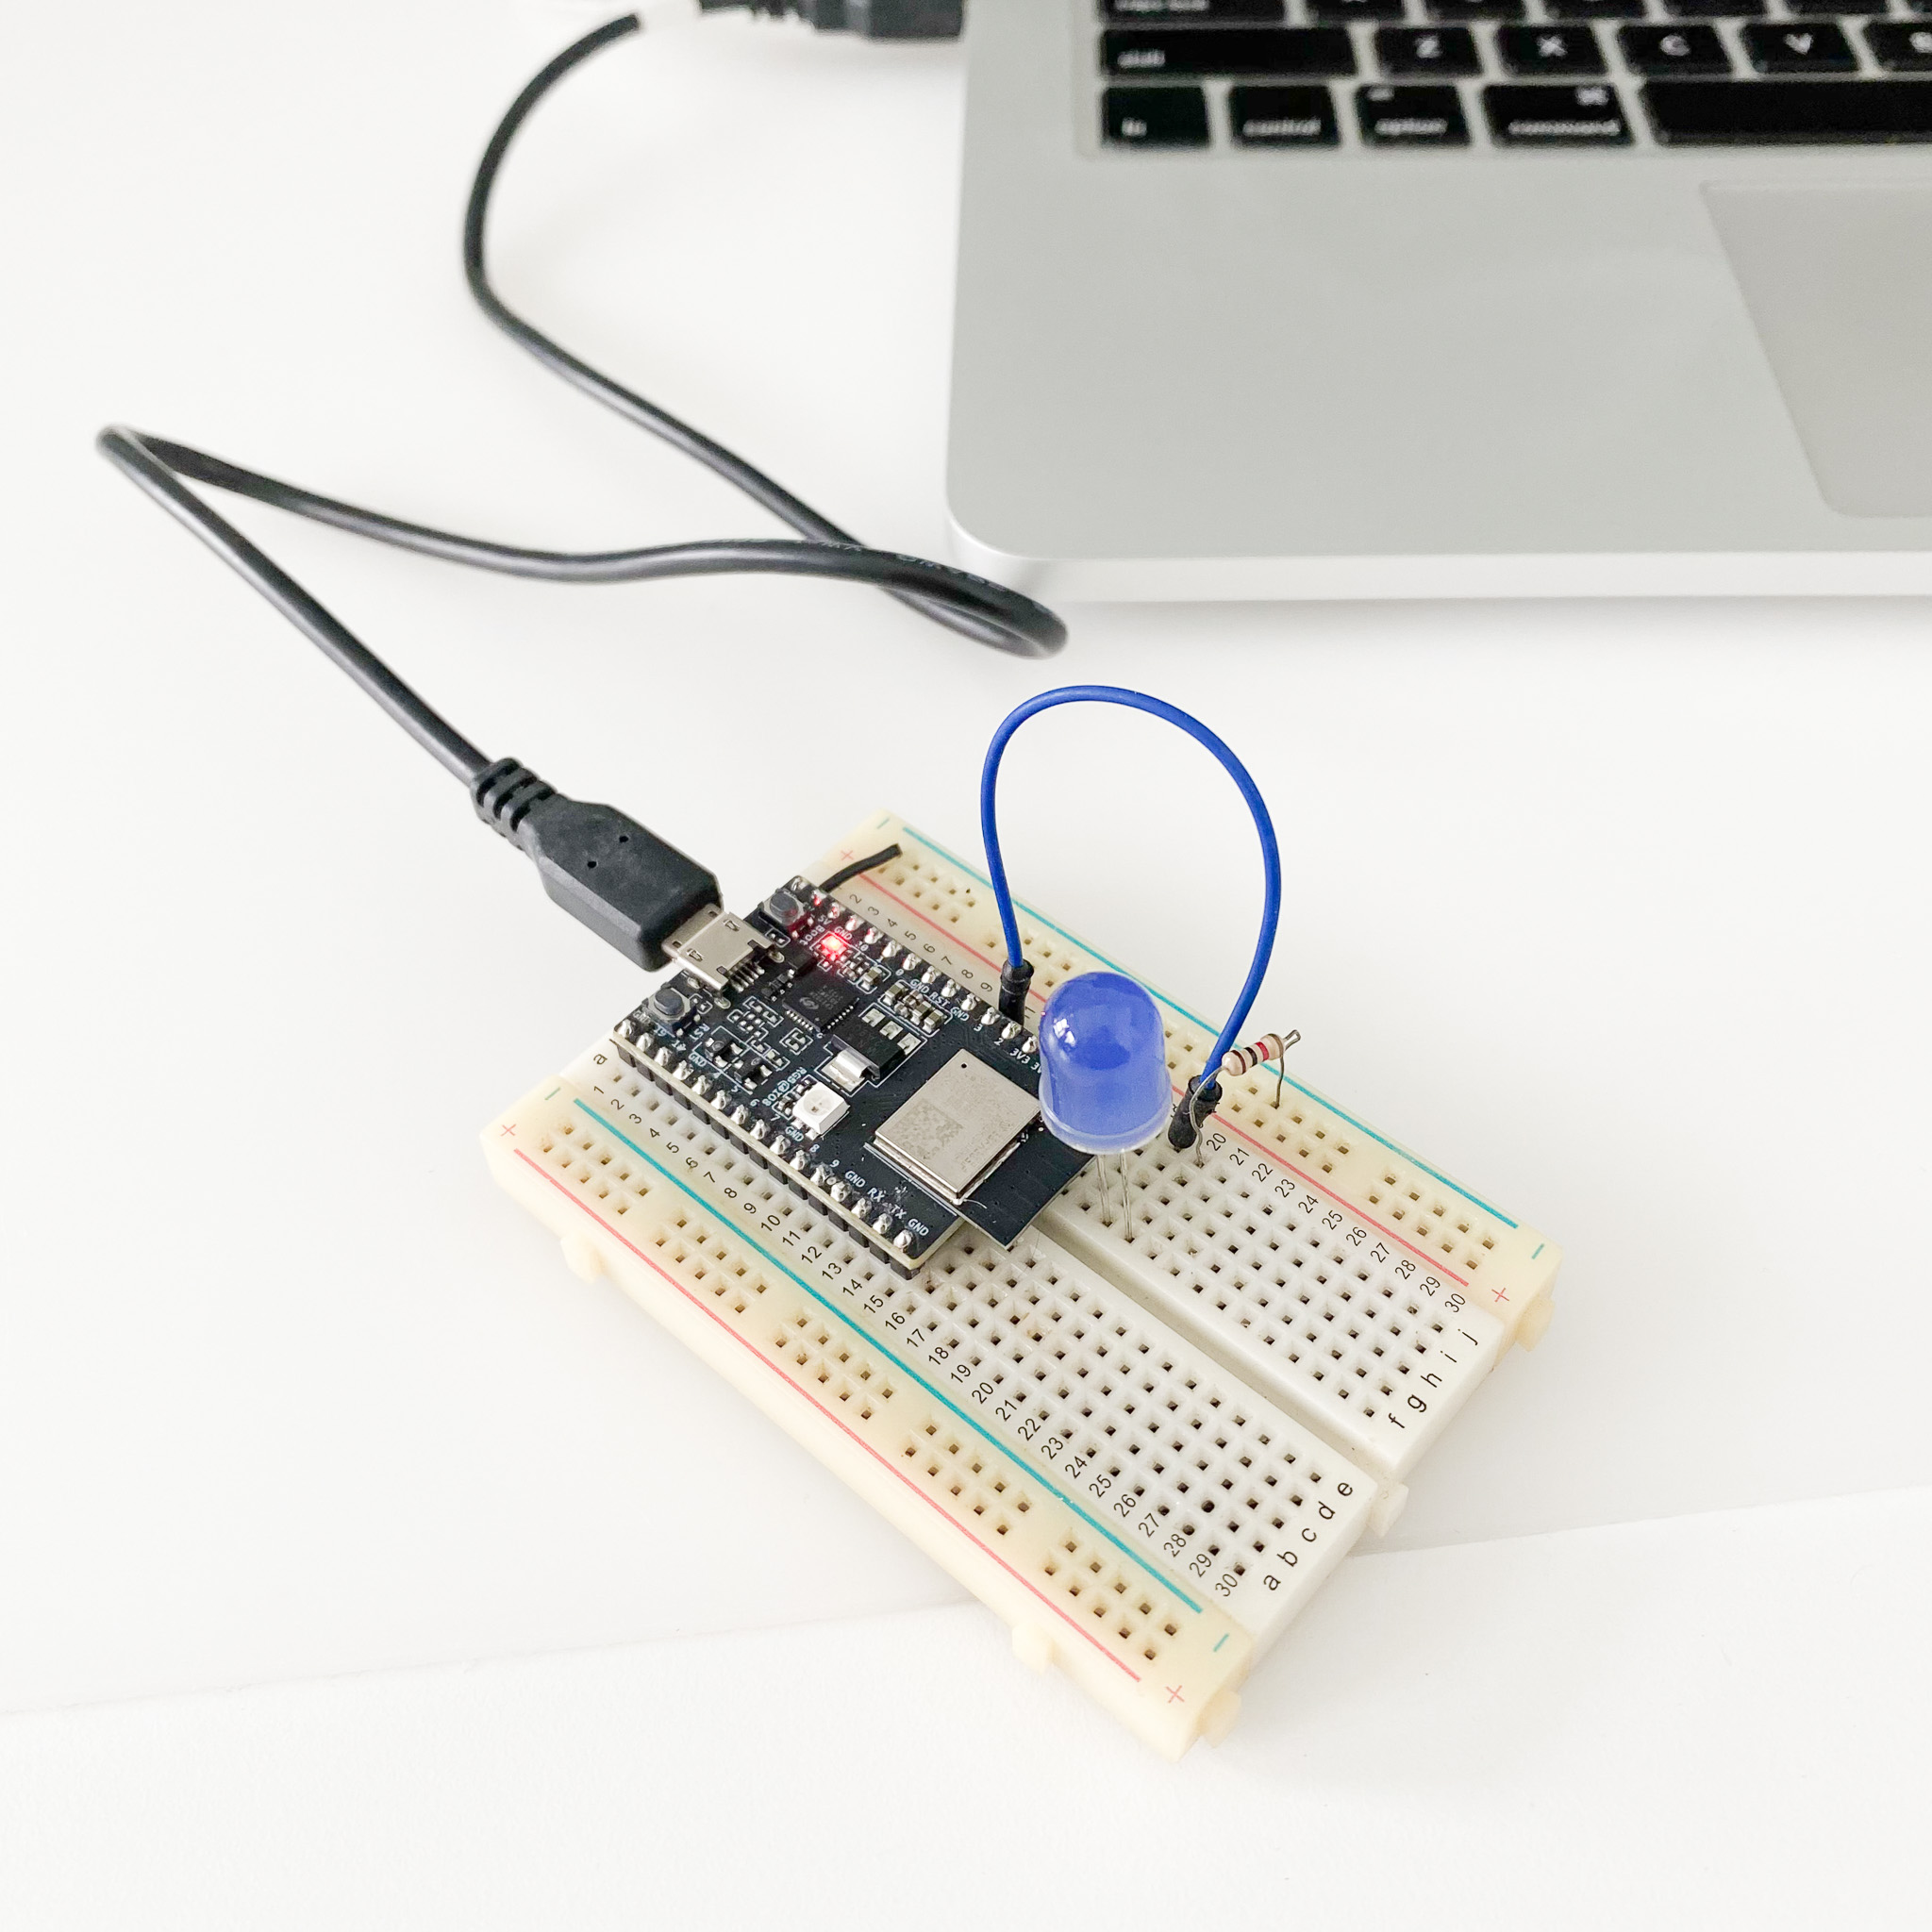
Prototype
A photo of the actual setup.
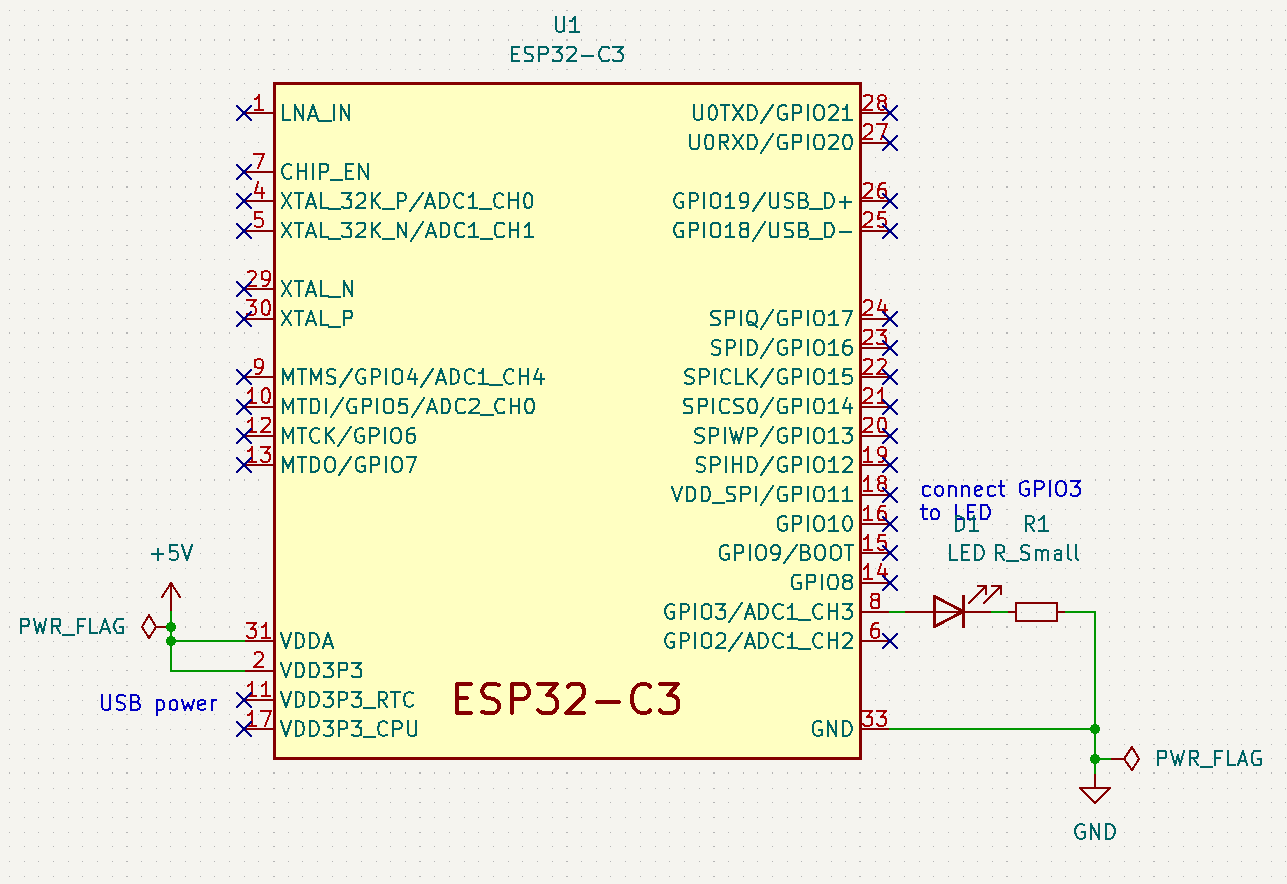
Schematic
Wire up the hardware accordingly
Dependancies
A photo of the actual setup.
Wire up the hardware accordingly
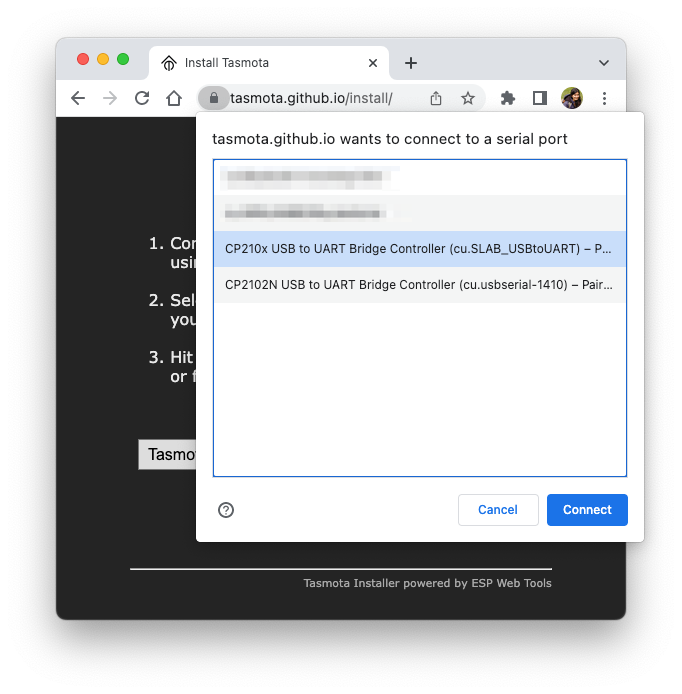
Plug into the USB port of the board and check the port
 $ ls /dev/cu.*

 /dev/cu.Bluetooth-Incoming-Port  /dev/cu.MINIJAMBOXbyJawbone  /dev/cu.SLAB_USBtoUART  /dev/cu.usbserial-1410
ESP32-C3 in the dropdown listConnect to the port e.g. /dev/cu.SLAB_USBtoUART
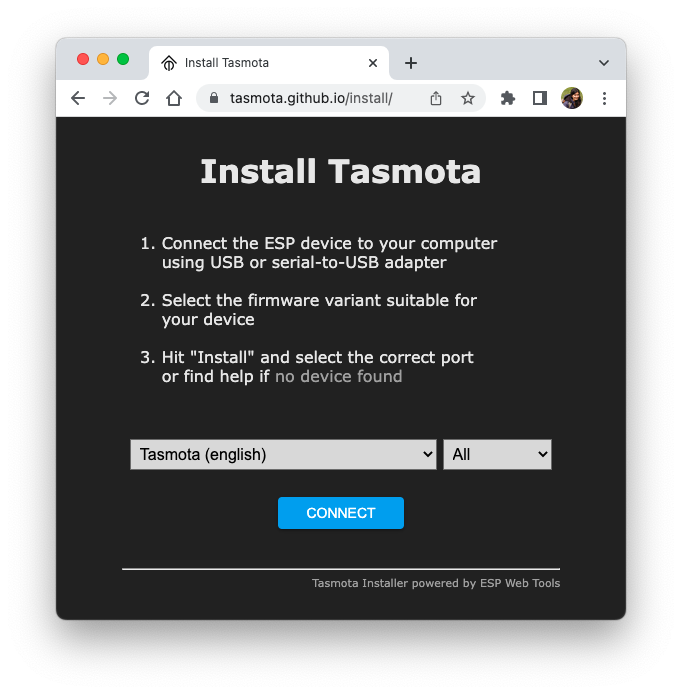
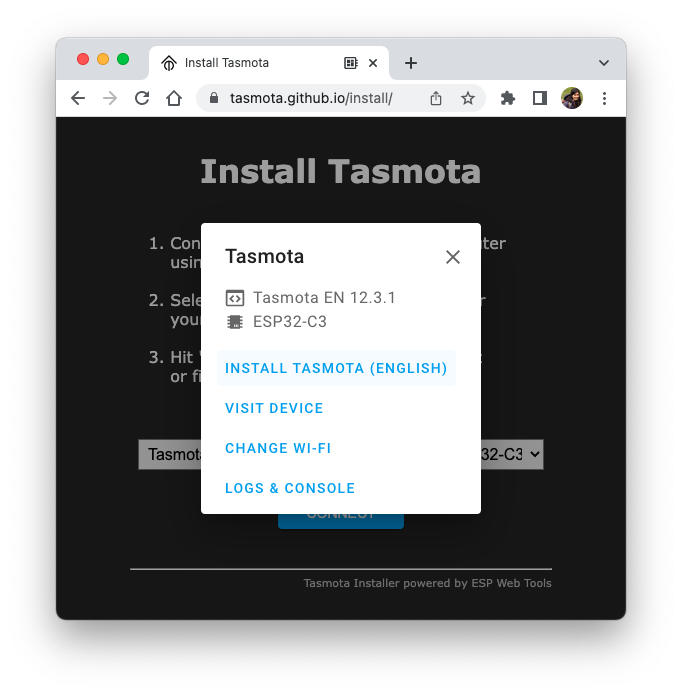
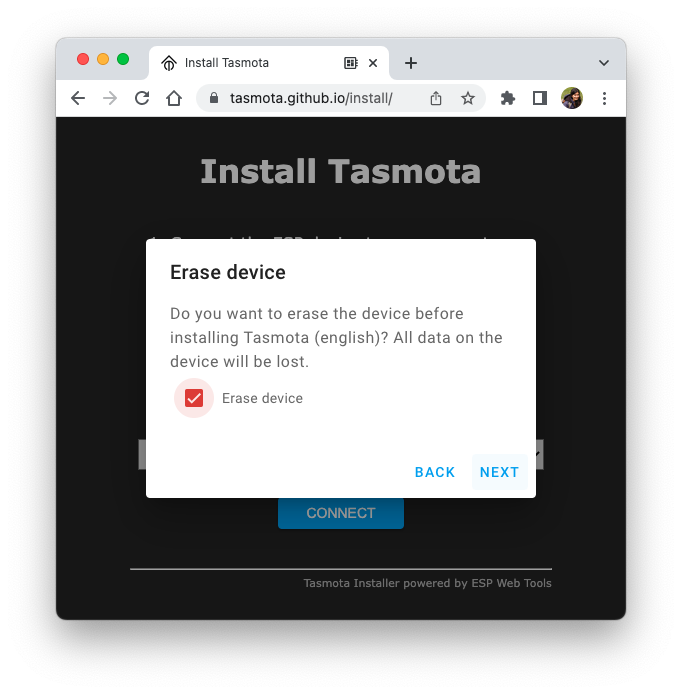
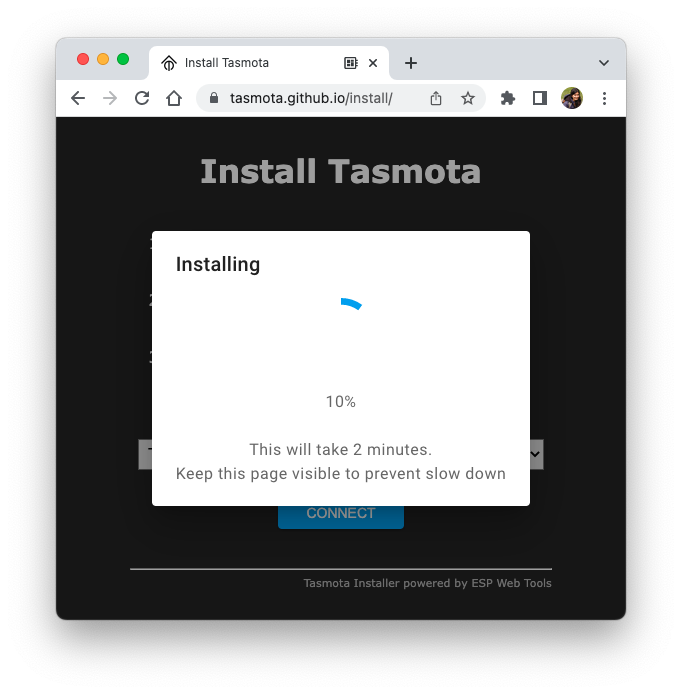
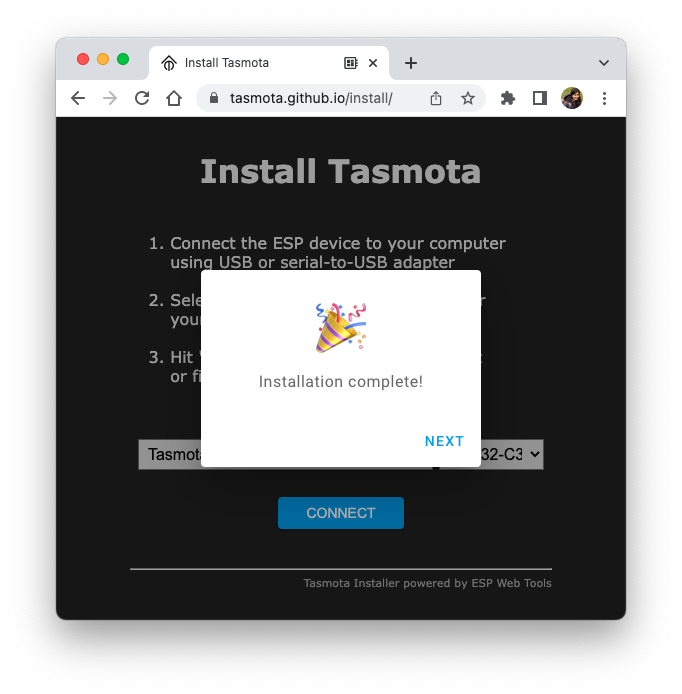
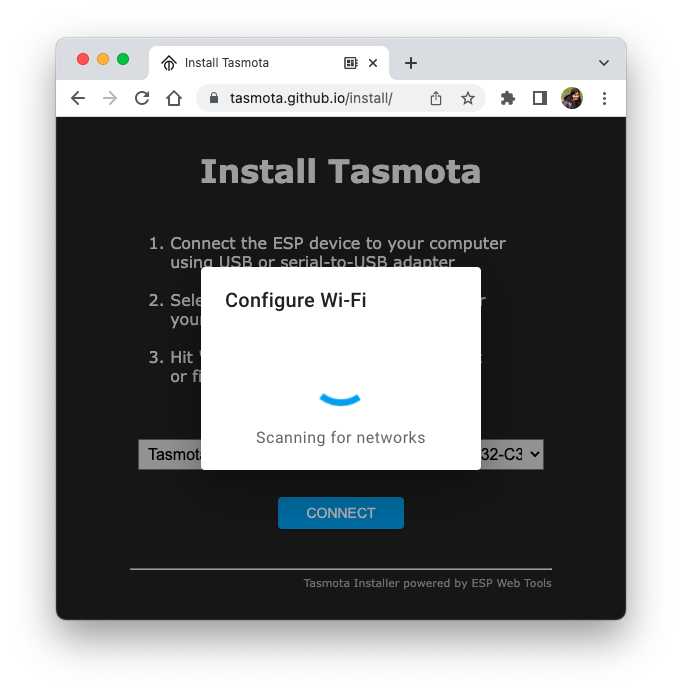
Install Tasmota
Ensure automatic configure wifi dialogue is seen
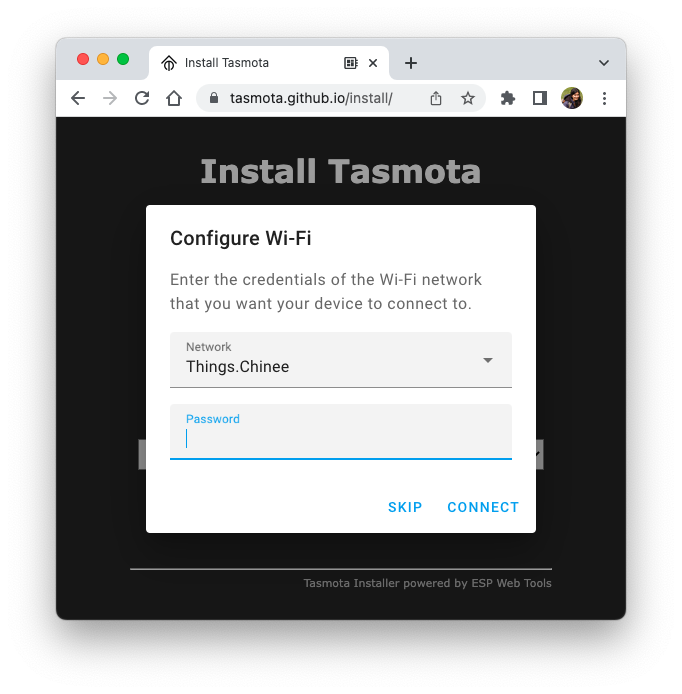
Connect to the WiFi with SSID and password
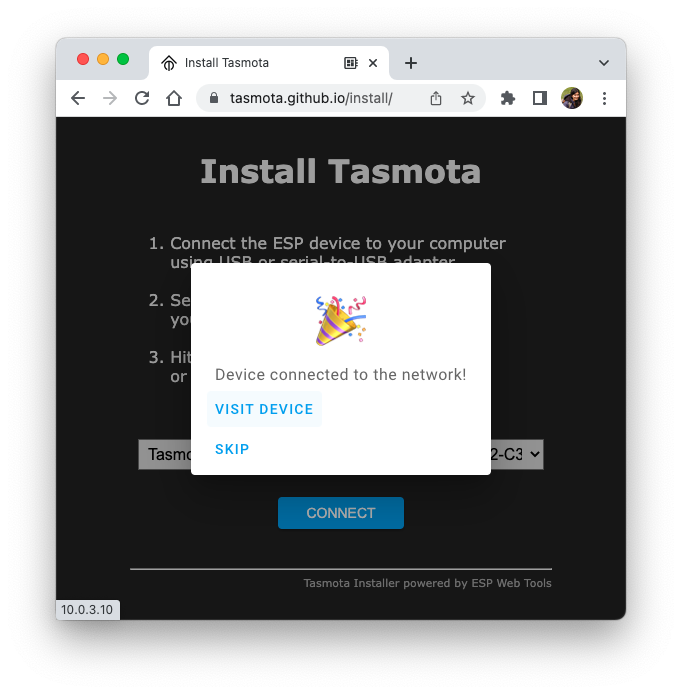
Visit the device URL at 10.0.3.10
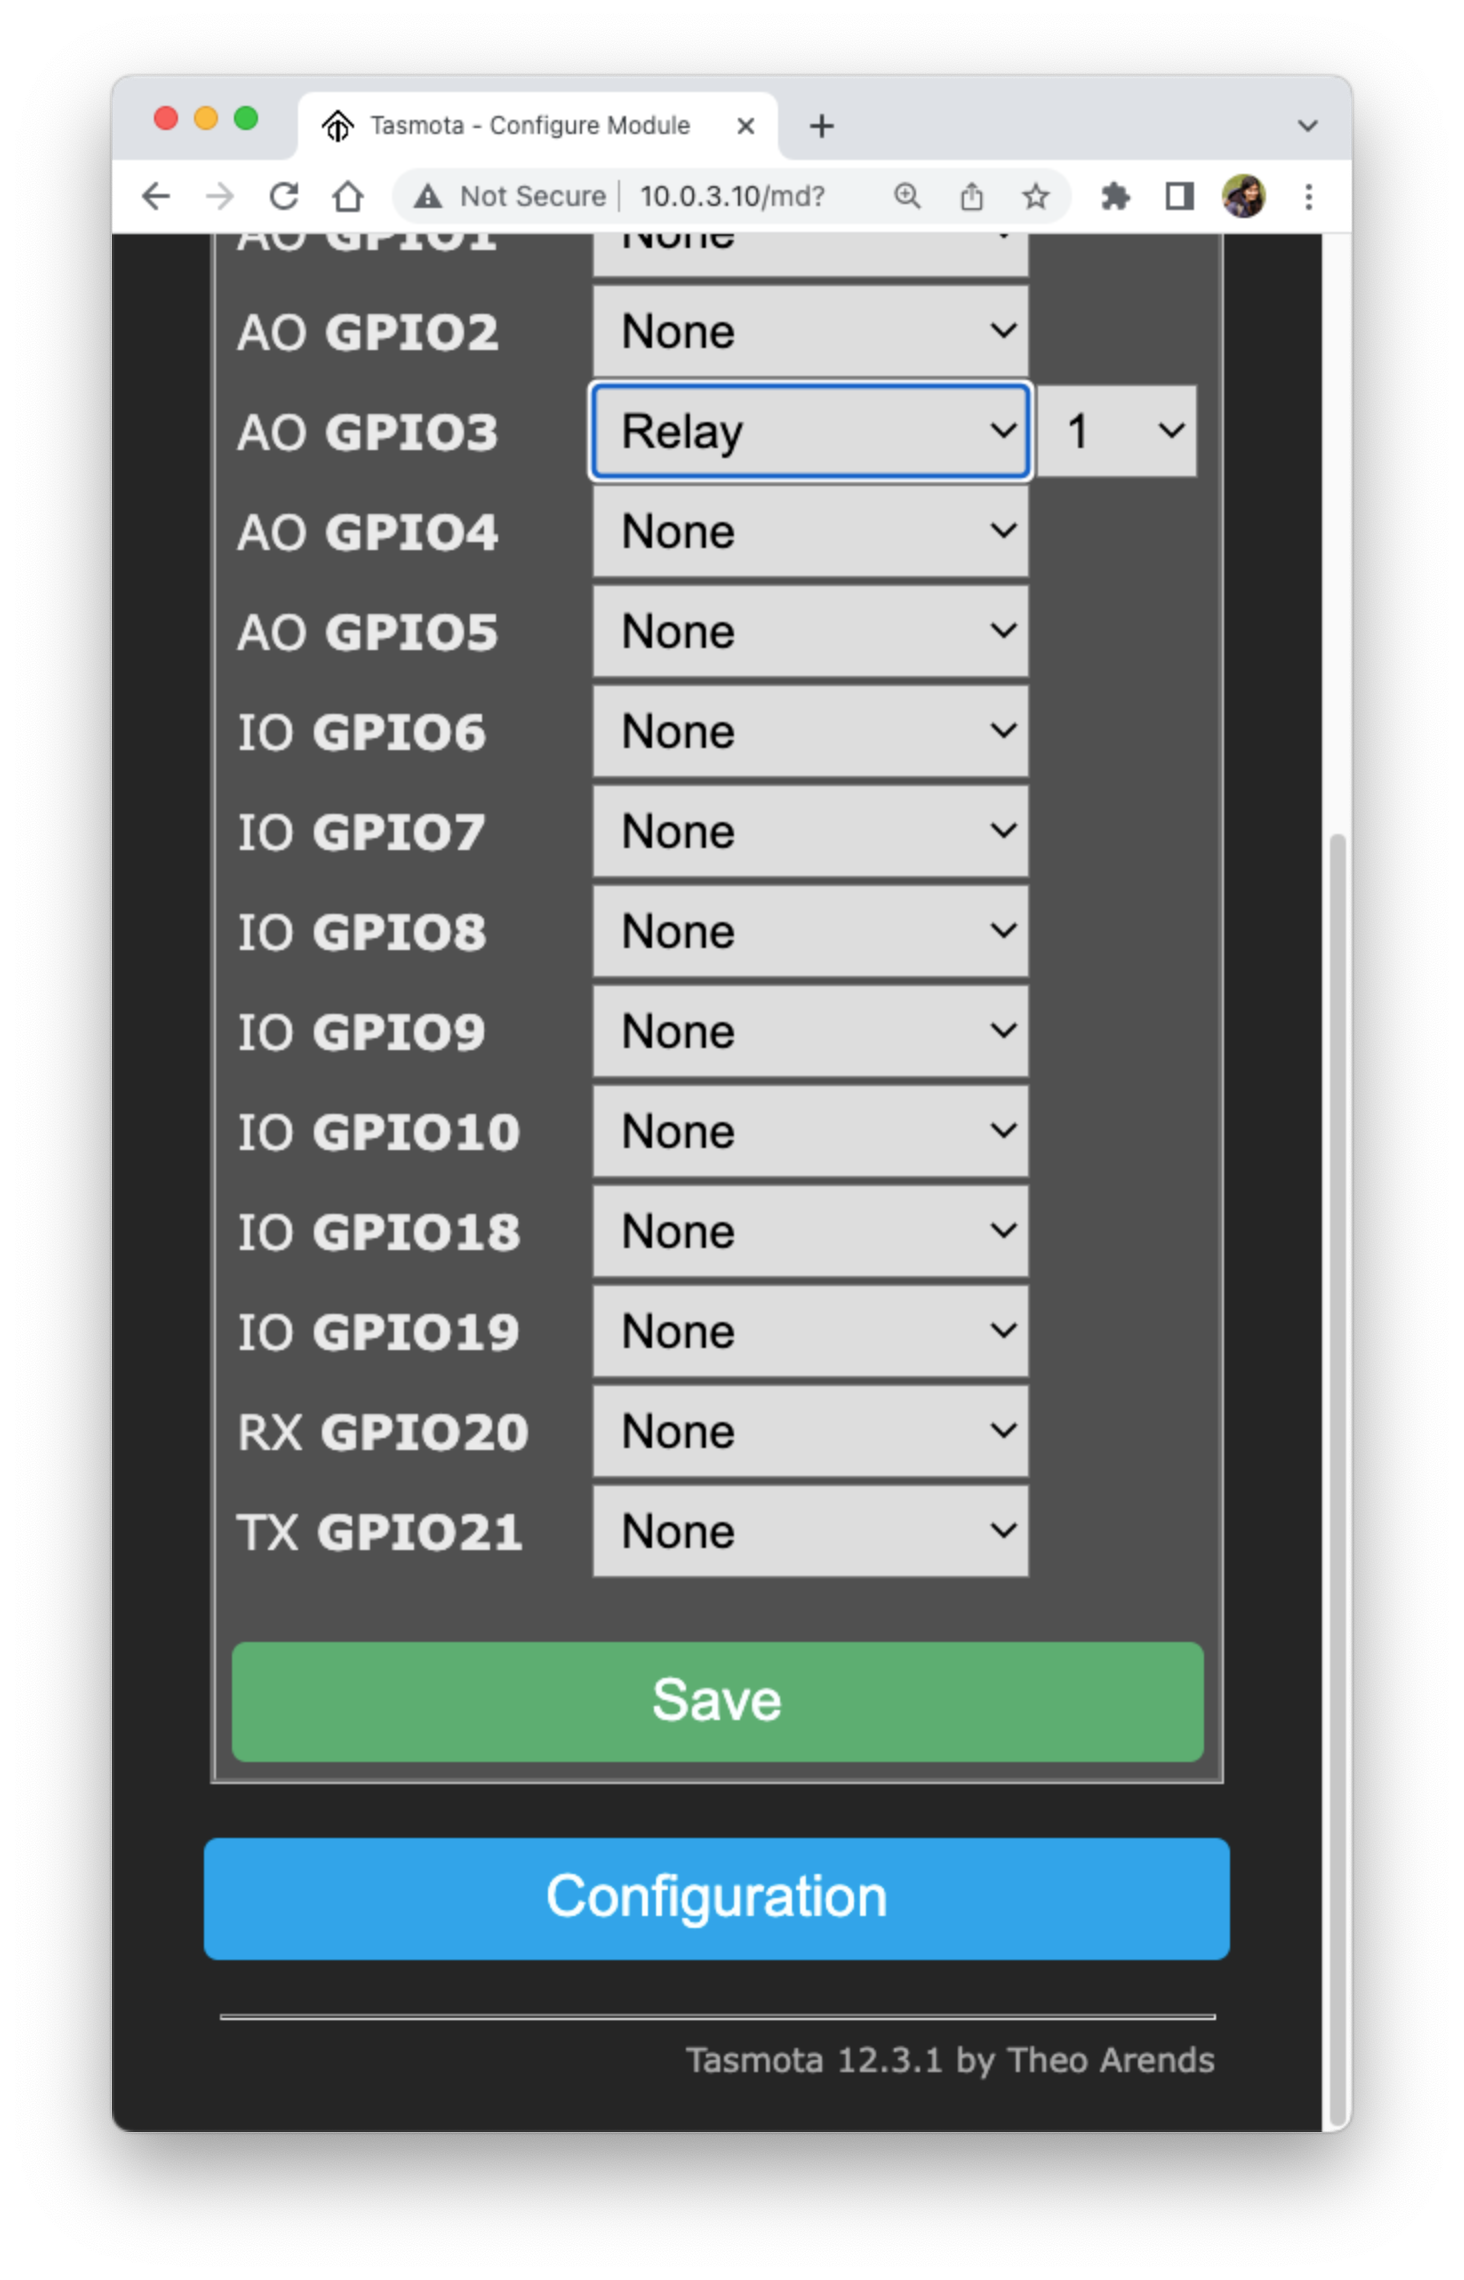
GPIO3

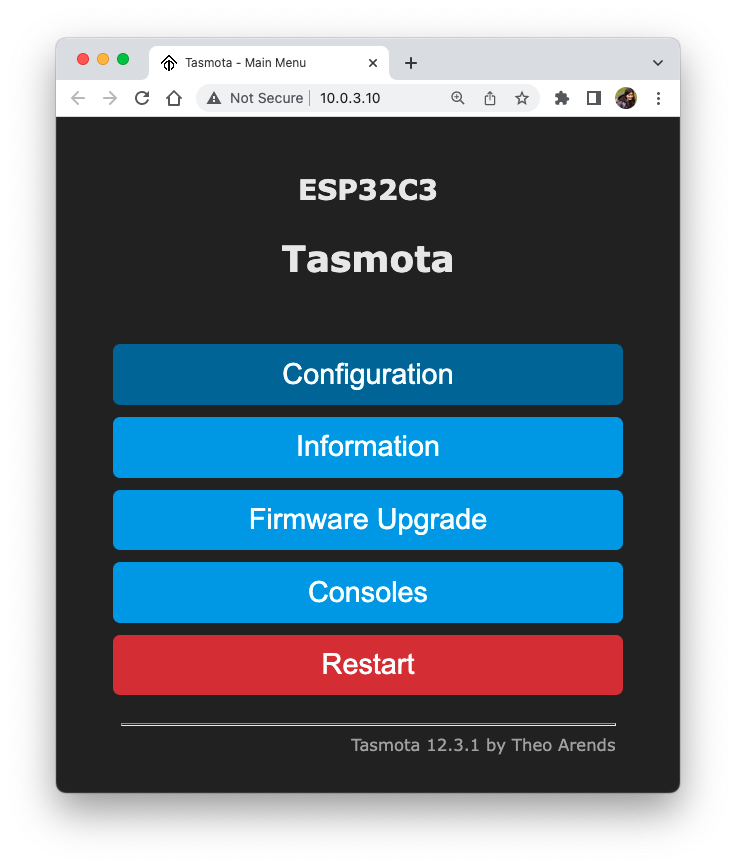
Configuration
Configure Module

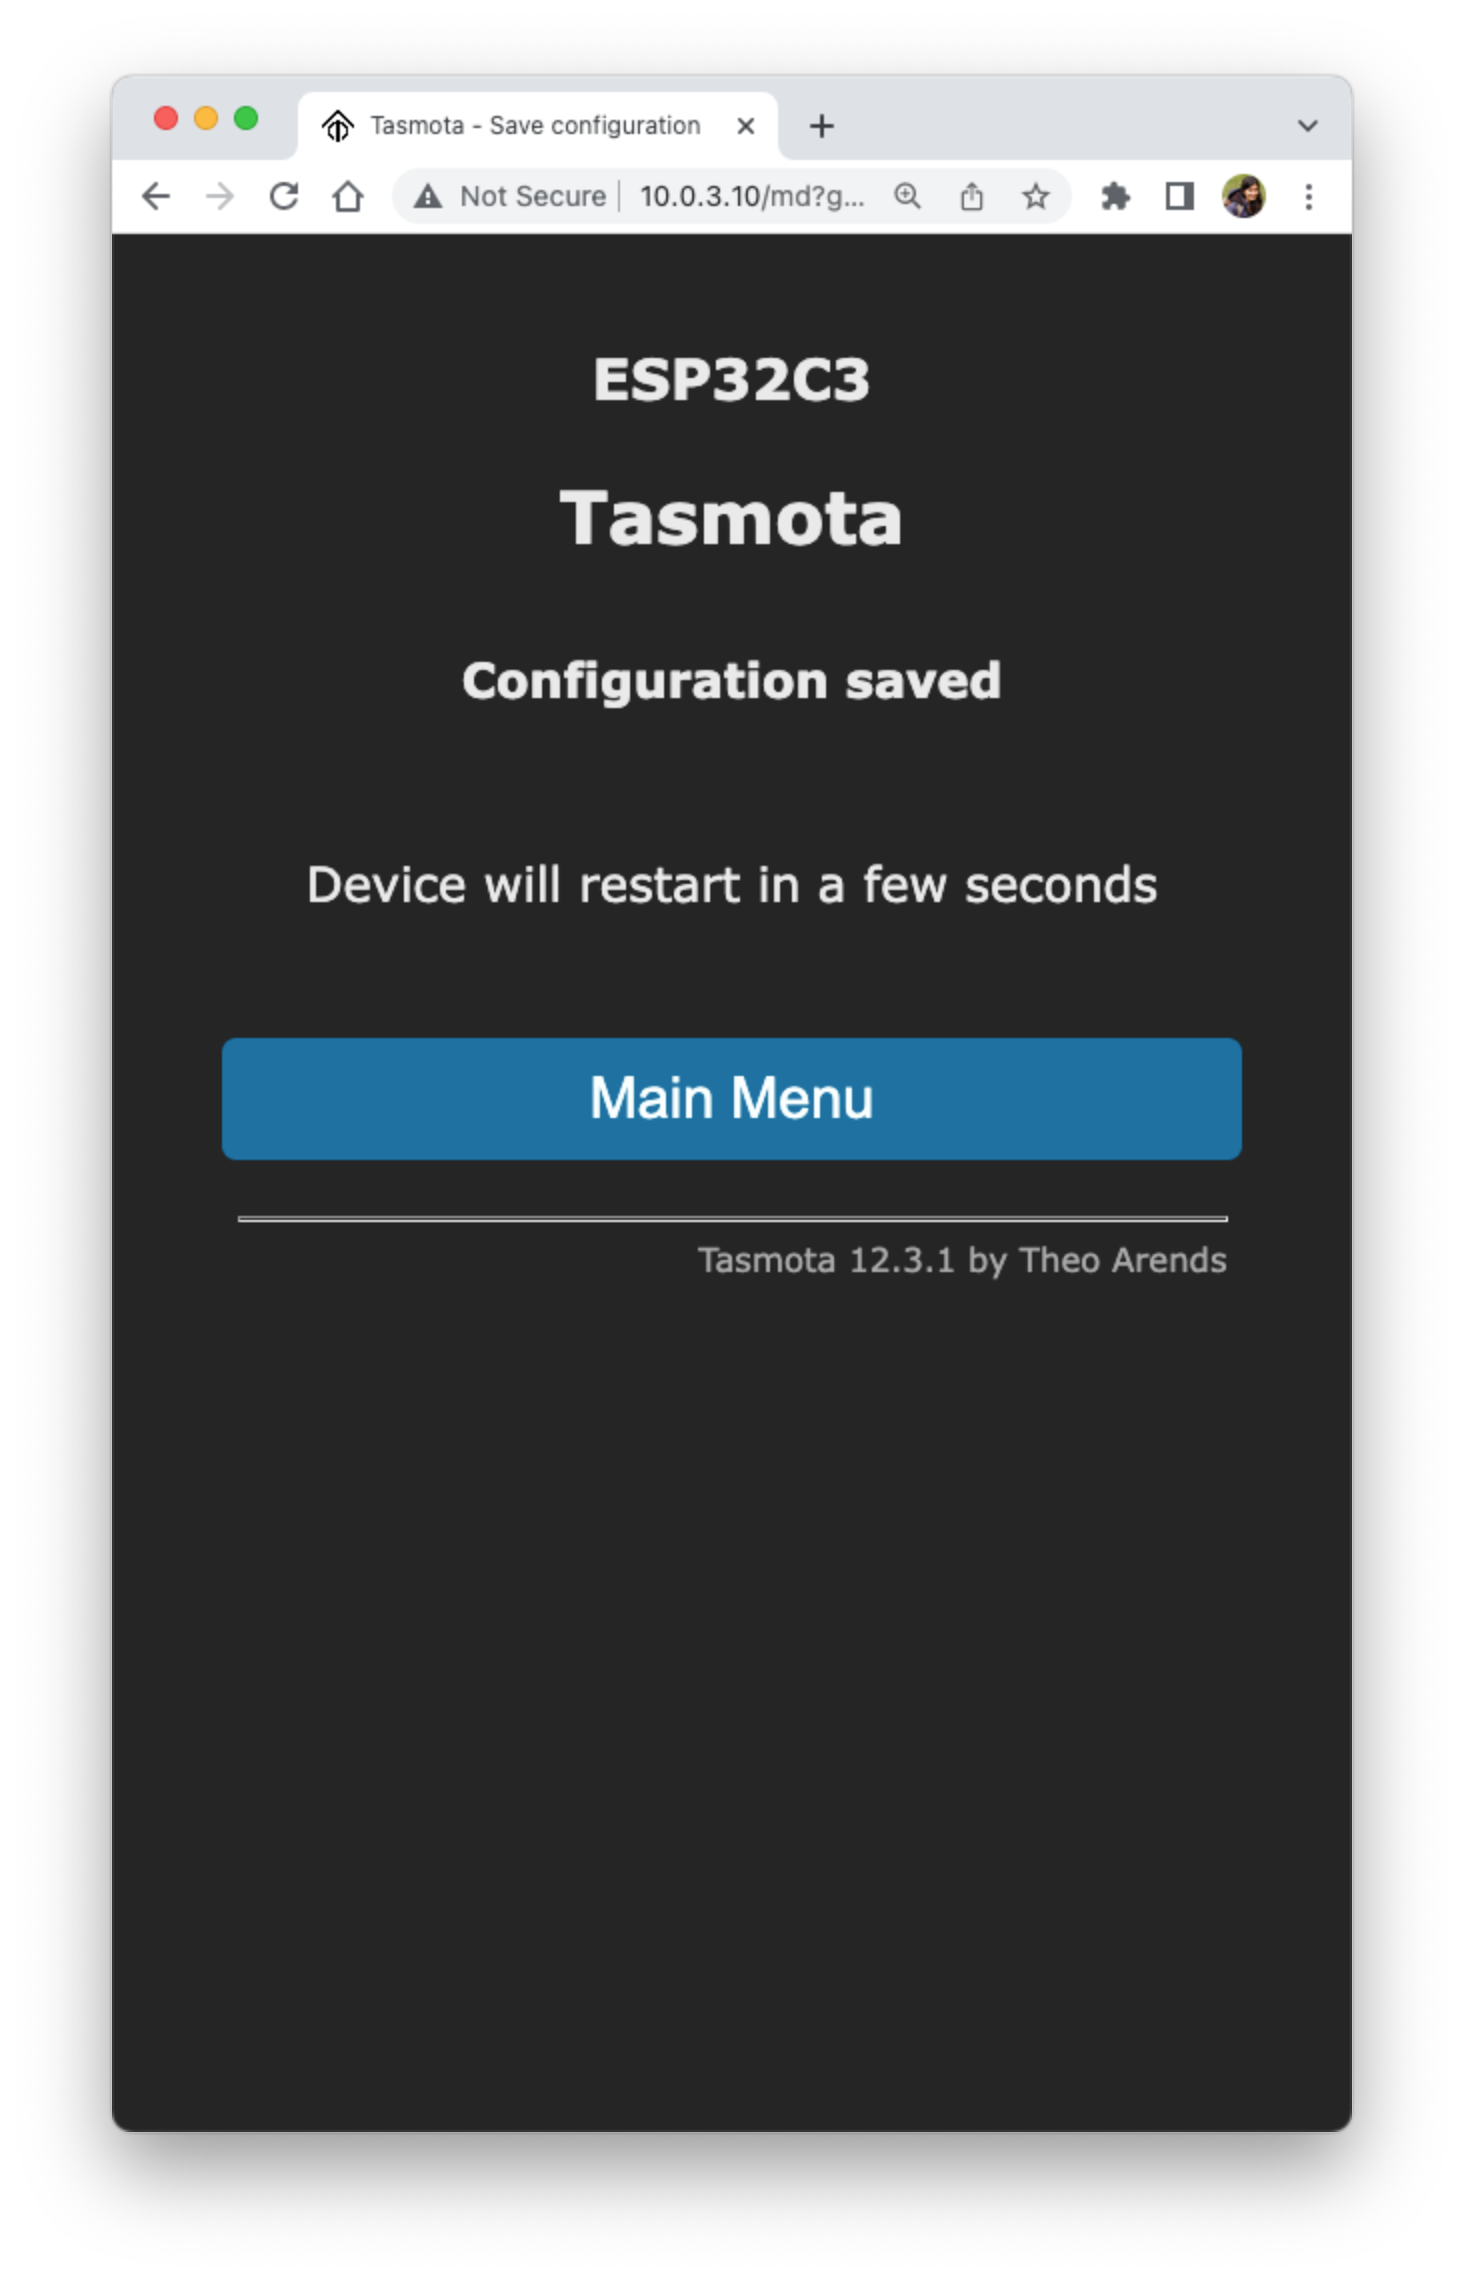
GPIO3 to Relay number 1 and save configuration
ON and OFF to control the LED
