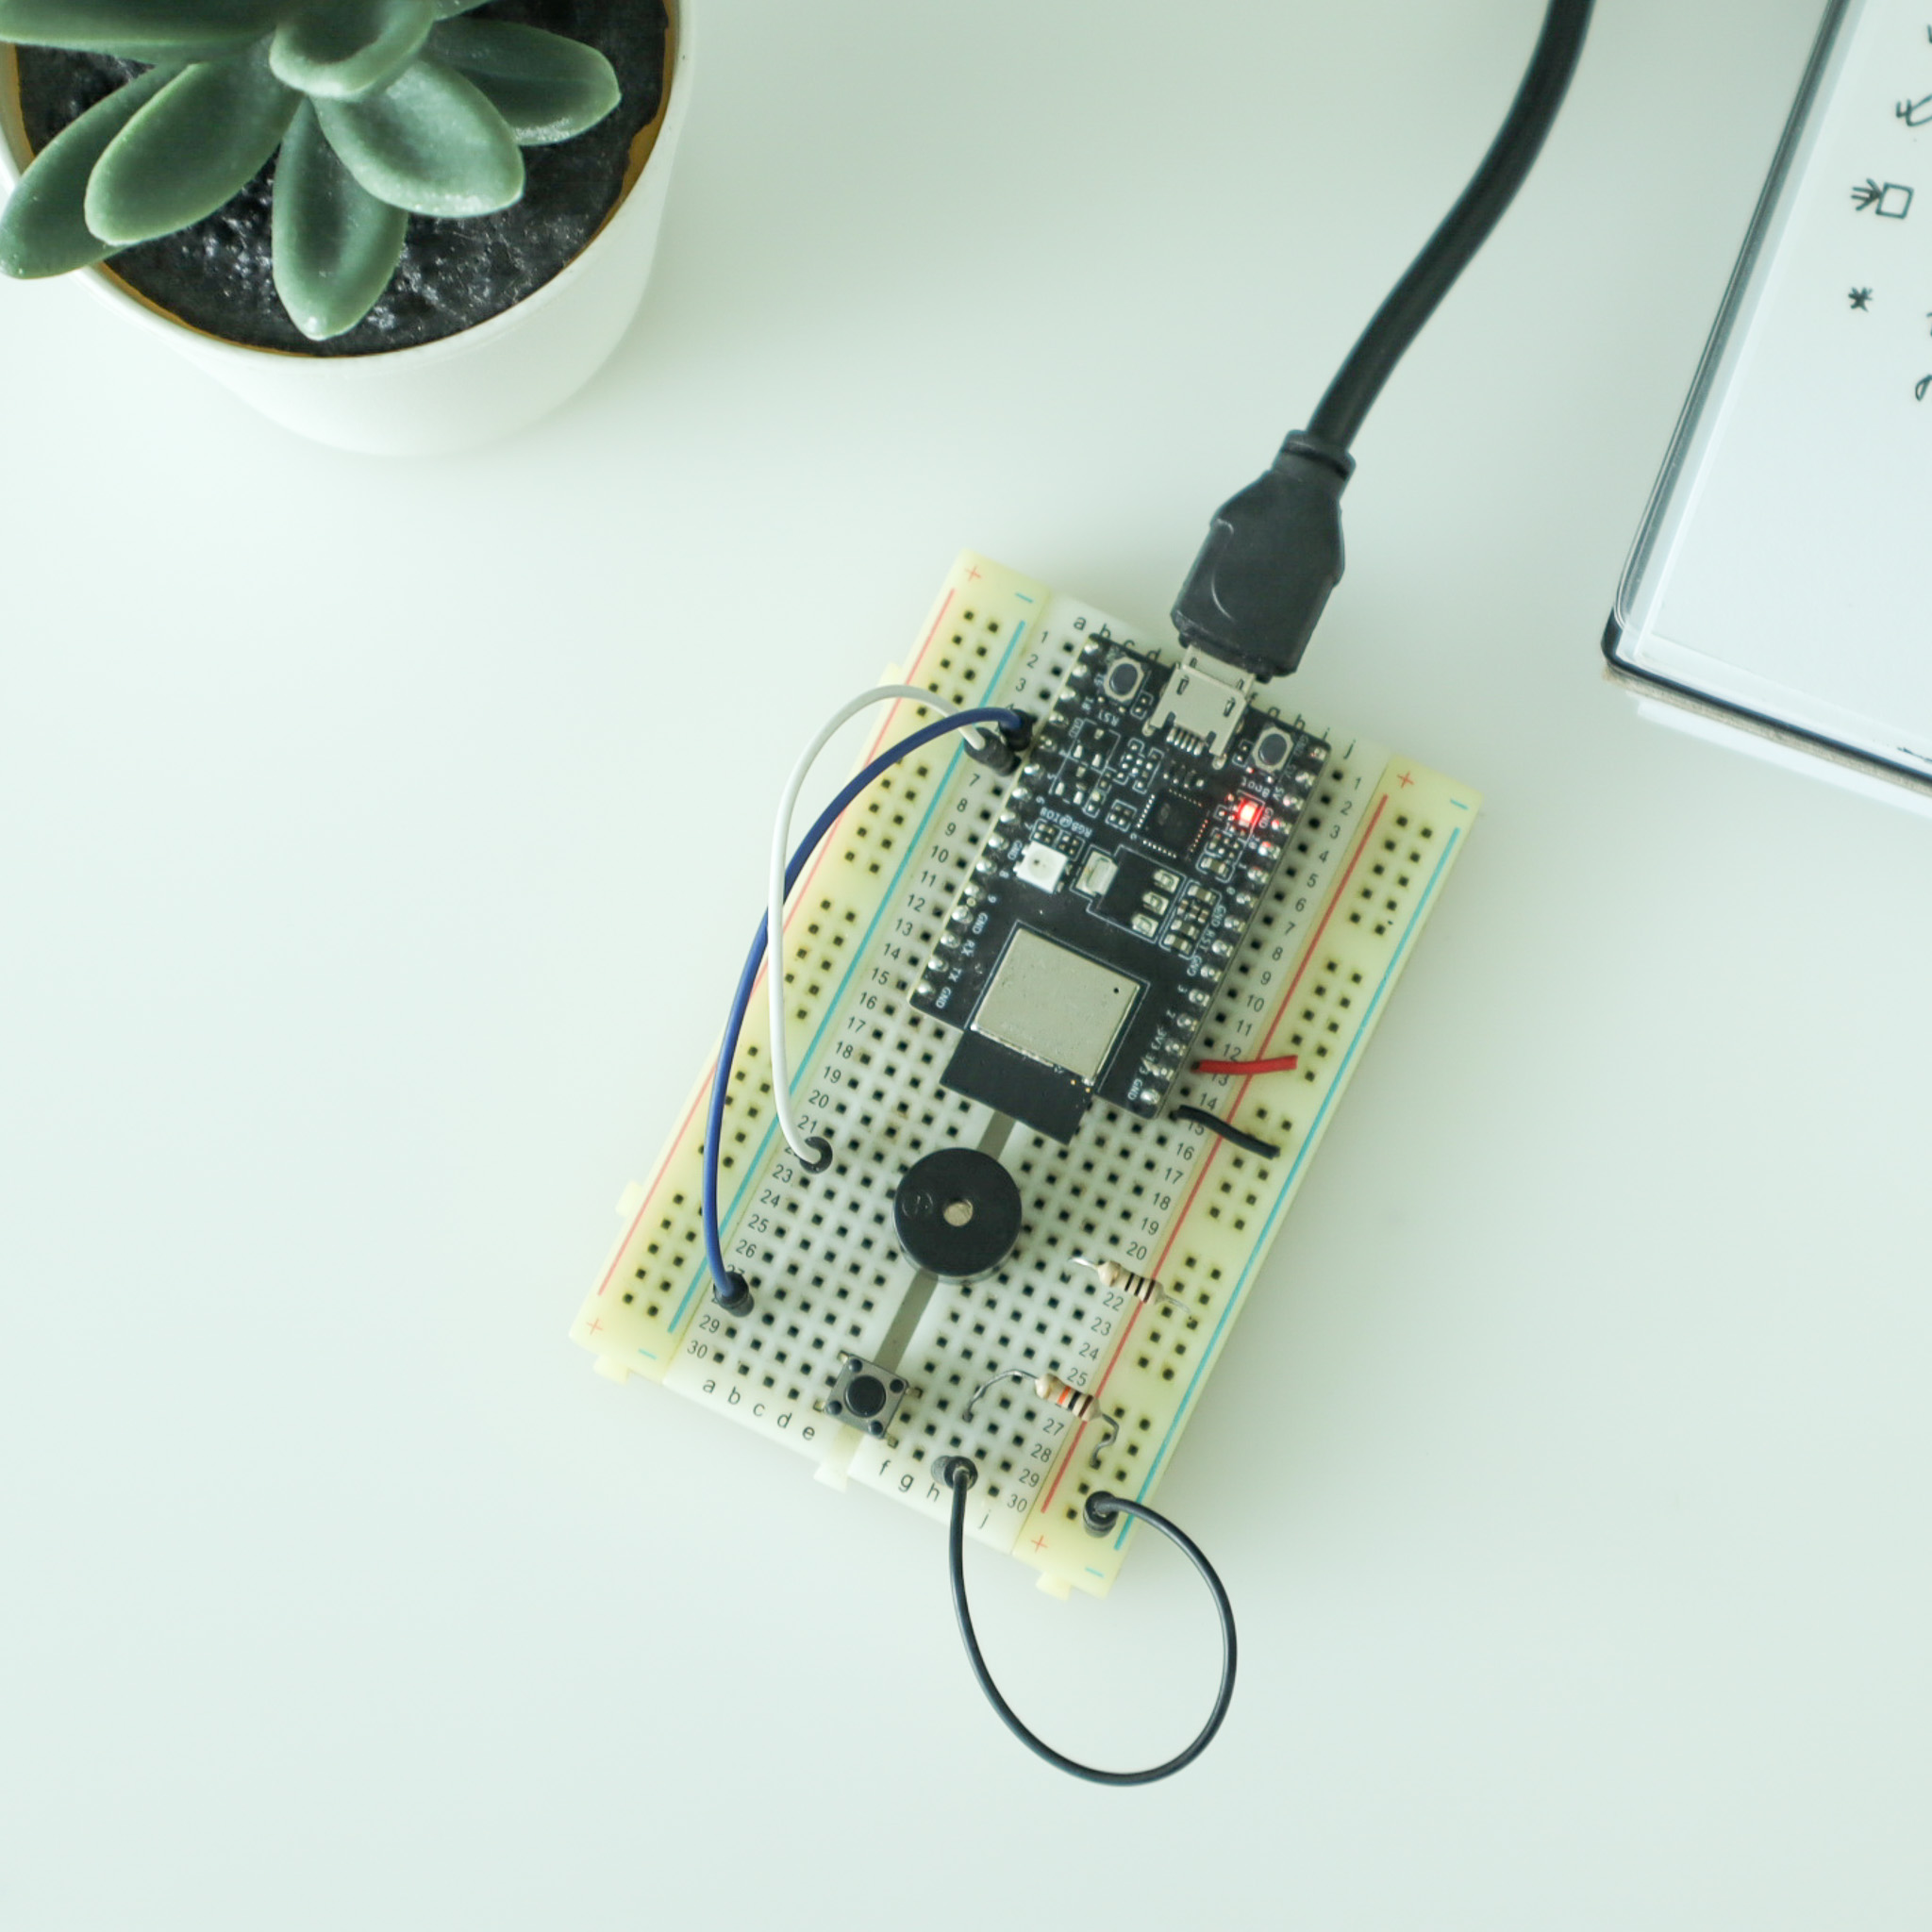
Prototype
A photo of the actual setup.
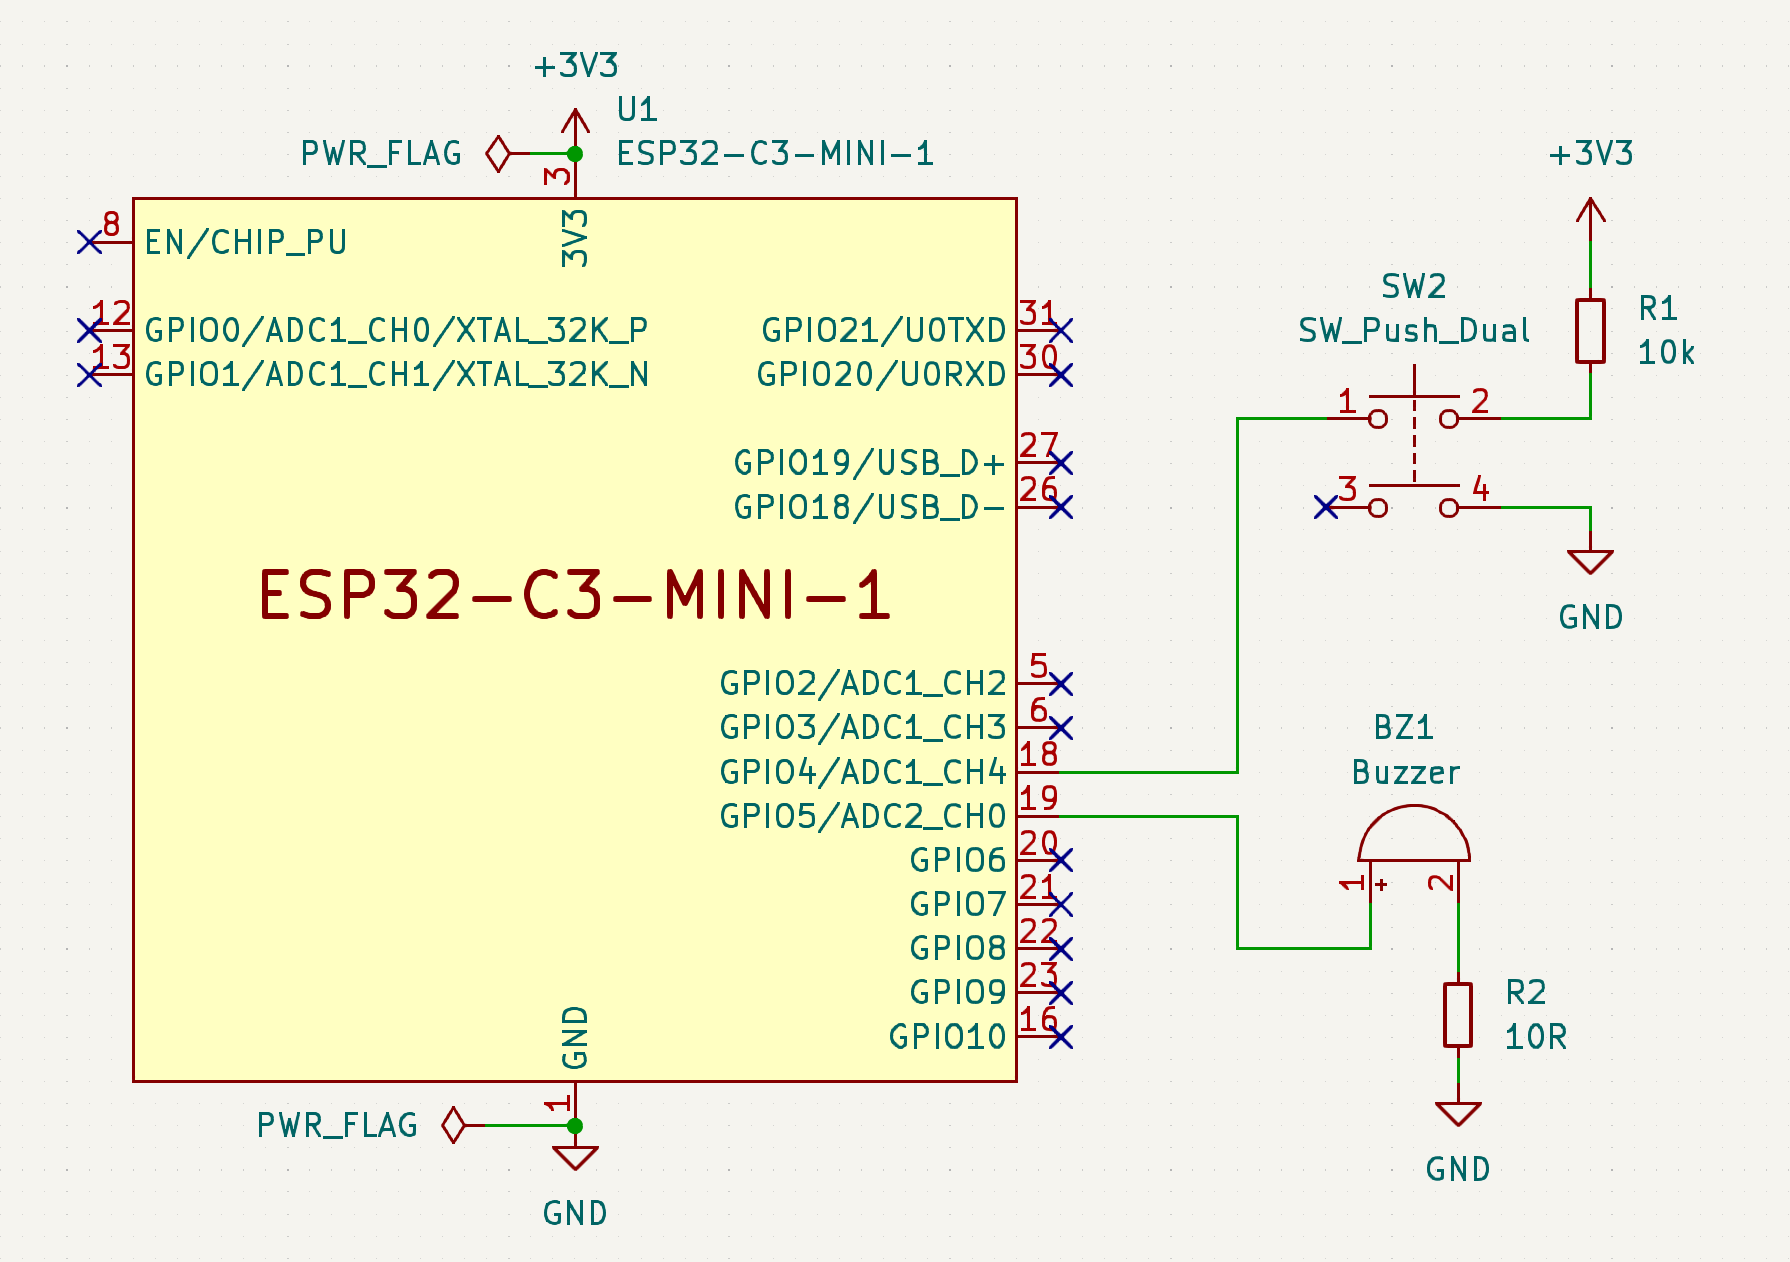
Schematic
Wire up the hardware accordingly
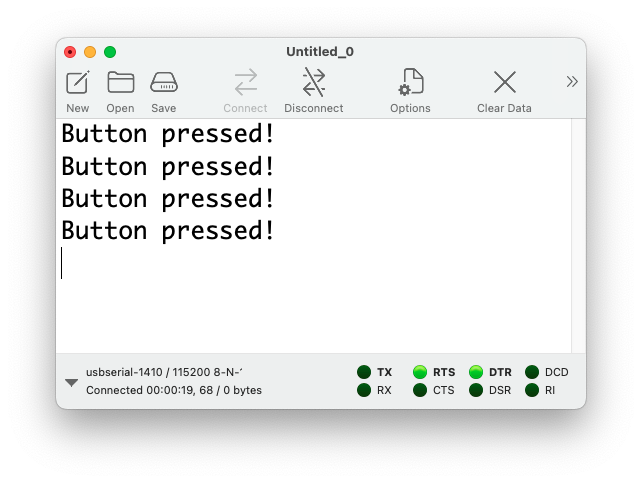
Serial console
Serial output from the firmware.
Dependancies
Pre-requisites
Buy the components
press-buzzer-arduino-esp32c3.ino
const int buttonPin = 4;
const int buzzerPin = 5;
bool buttonState = 0;

void setup() {
  pinMode(buttonPin, INPUT_PULLUP);
  pinMode(buzzerPin, OUTPUT);
  digitalWrite(buzzerPin, LOW);
  Serial.begin(115200);
}

void loop() {
  buttonState = digitalRead(buttonPin);
  if (buttonState == LOW) {
    Serial.println("Button pressed!");
    digitalWrite(buzzerPin, HIGH);  // Buzzer sound is on
    delay(1000);
    digitalWrite(buzzerPin, LOW);  // Buzzer sound is off
    delay(1000);
  }
}BOARD?=esp32:esp32:esp32c3
PORT?=/dev/cu.usbserial-*
BUILD=build
.PHONY: default lint compile upload clean
default: lint compile upload clean
lint:
cpplint --extensions=ino --filter=-legal/copyright *.ino
compile: clean
arduino-cli compile --fqbn $(BOARD) --output-dir $(BUILD) ./
upload:
arduino-cli upload --fqbn $(BOARD) --port $(PORT) --input-dir $(BUILD)
clean:
rm -rf buildA photo of the actual setup.
Wire up the hardware accordingly
Serial output from the firmware.
Press the button and hear the buzzer sound for 1 second.
Compile and upload the firmware via the Arduino IDE or arduino-cli with Makefile.