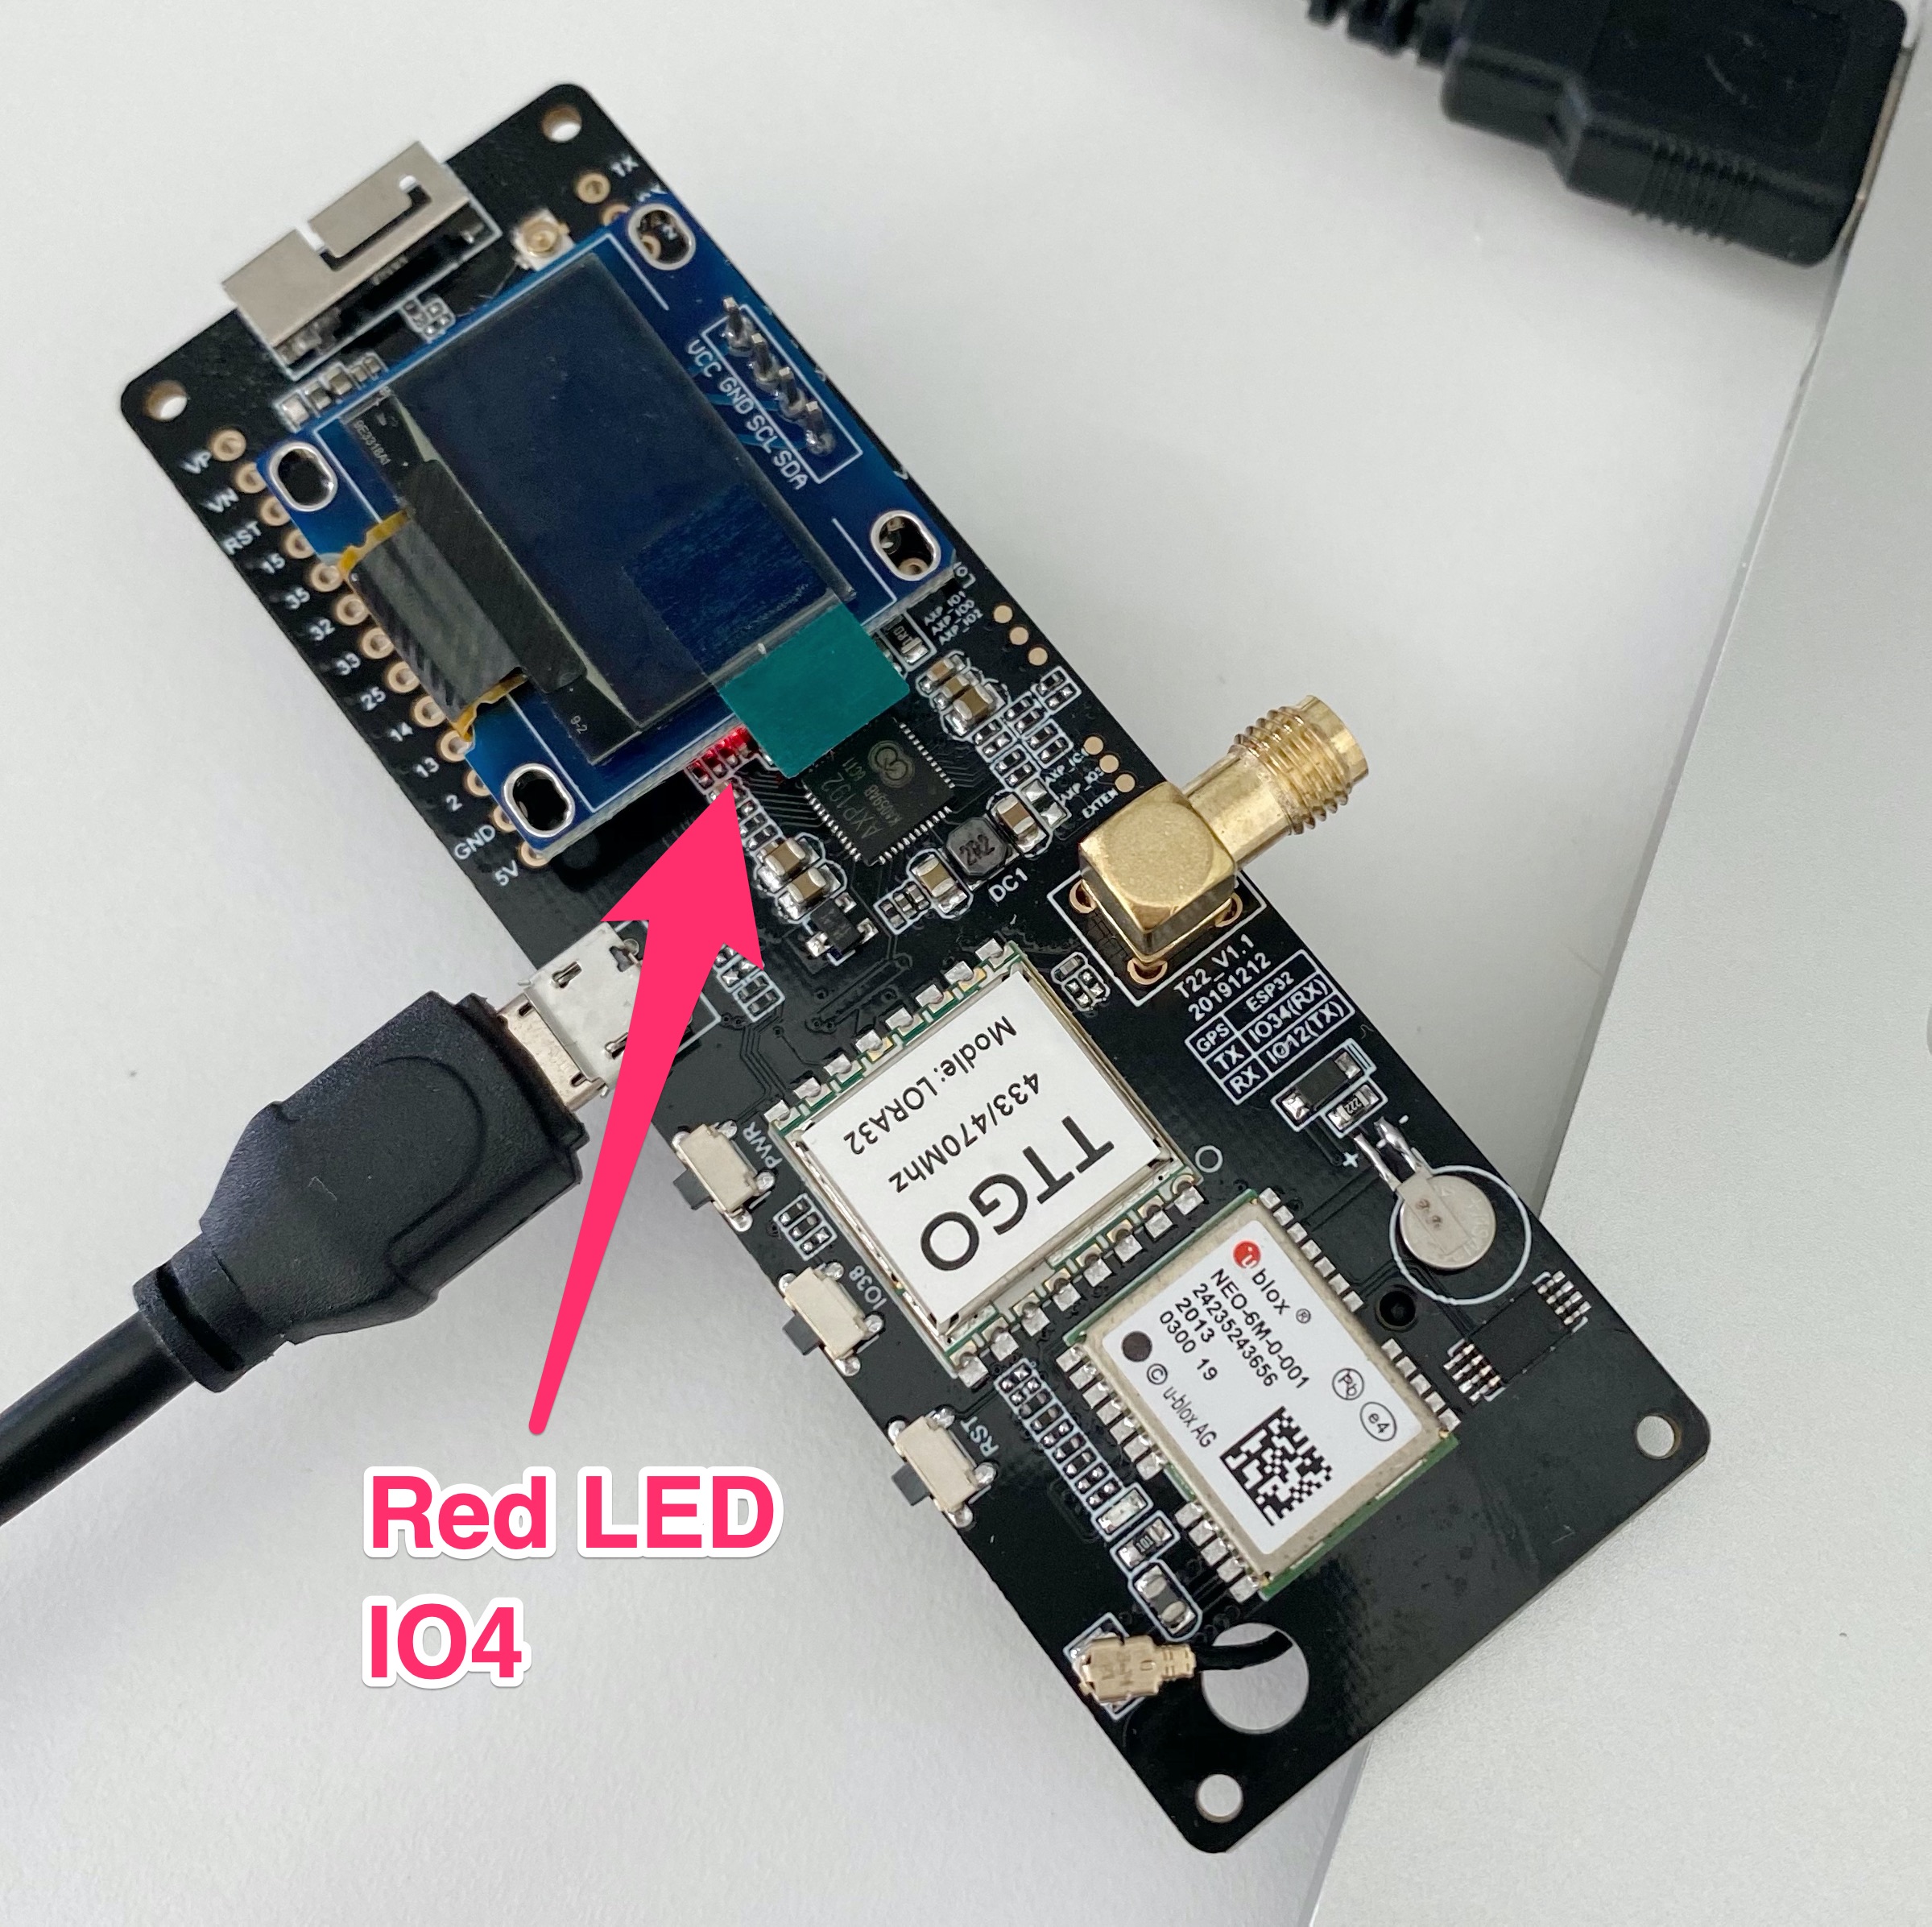
Prototype
A photo of the actual setup.
Serial console
Serial output from the firmware.

Dependancies
Buy the components
blinky-esp32-t-beam.ino
#define LED 4

void setup() {
  pinMode(LED, OUTPUT);
  digitalWrite(LED, LOW);

  Serial.begin(115200);
  Serial.println("Start blinky");
}

void loop() {
  Serial.println("LED ON");
  digitalWrite(LED, LOW);
  delay(1000);

  Serial.println("LED OFF");
  digitalWrite(LED, HIGH);
  delay(1000);
}BOARD?=esp32:esp32:t-beam
PORT?=/dev/cu.SLAB_USBtoUART
.PHONY: default lint all flash clean
default: all flash clean
lint:
cpplint --extensions=ino --filter=-legal/copyright *.ino
all:
arduino-cli compile --fqbn $(BOARD) ./
flash:
arduino-cli upload -p $(PORT) --fqbn $(BOARD)
clean:
rm -r buildA photo of the actual setup.
Serial output from the firmware.
This example contains a simple blinky program for the ESP32-based T-Beam by Xinyuan LilyGO version T22_V1.1, 20191212.
Setup arduino-cli or Arduino IDE with boards URL for ESP32
https://raw.githubusercontent.com/espressif/arduino-esp32/gh-pages/package_esp32_index.json
make command.